The grip is vital in curving a bowling ball. A fingertip grip, where your fingers are inserted up to the first joint, offers more control and is conducive to throwing a hooked ball. It allows for greater rotation and spin, key elements in achieving a curve. If you’re serious about improving, consider having a custom ball drilled to fit your grip once you’ve mastered the basic hook.
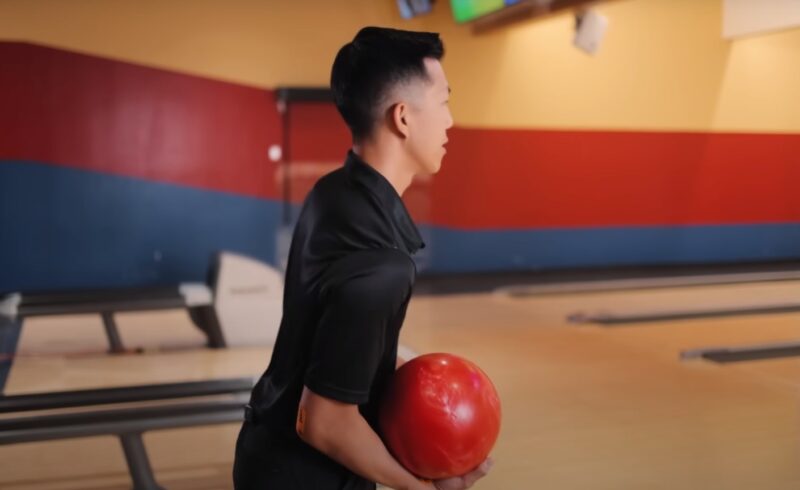
Work On Your Stance and Grip
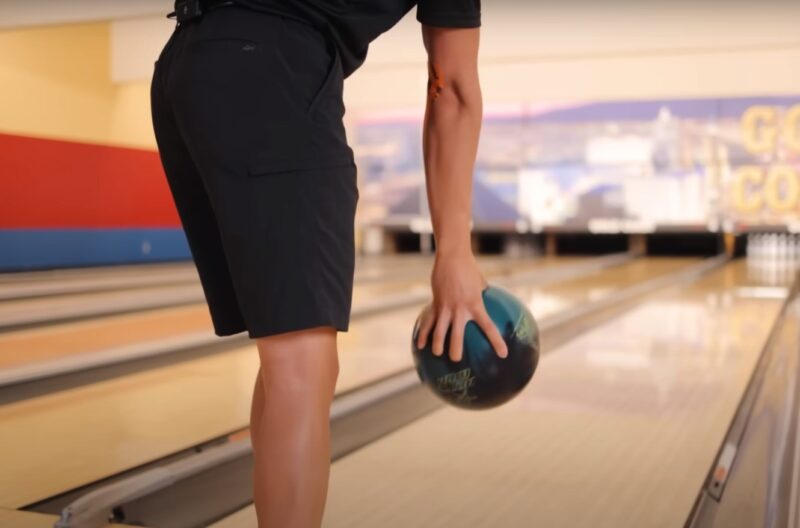
A proper stance sets the stage for a successful curve. Align your body with the arrows on the lane, not the pins. Your feet should be shoulder-width apart, with your weight balanced. Grip the ball comfortably, not too tightly, to allow for a smooth release.
Remember, the stance and grip are the foundation of your technique, and getting them right is crucial for a consistent curve.
Grip Variations and Their Effects
Experiment with different grips to find what works best for you. The strength of your wrist during the approach also plays a crucial role. A strong, firm wrist position helps control the trajectory.
As you practice, pay attention to how slight variations in your grip and wrist position affect the ball’s motion and curve degree.
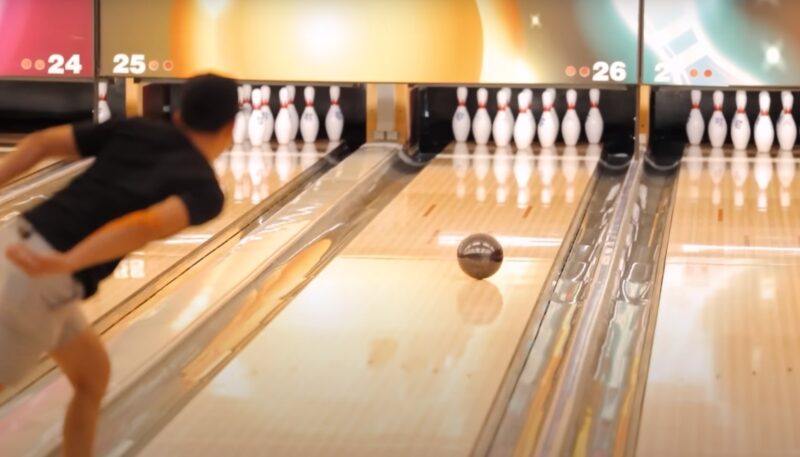
Improve Your Movement
The approach is a series of steps leading to the release of the ball. A smooth, controlled approach is key. Start with a steady pace and gradually increase your speed as you approach the foul line. Keep your movements fluid and your focus on the arrow you’re aiming for.
Balance during your approach is crucial. Avoid jerky movements or overstriding, as they can throw off your aim. Focus is equally important. Keep your eyes on the target arrow throughout your approach, as this helps in aligning your throw and achieving the desired curve.
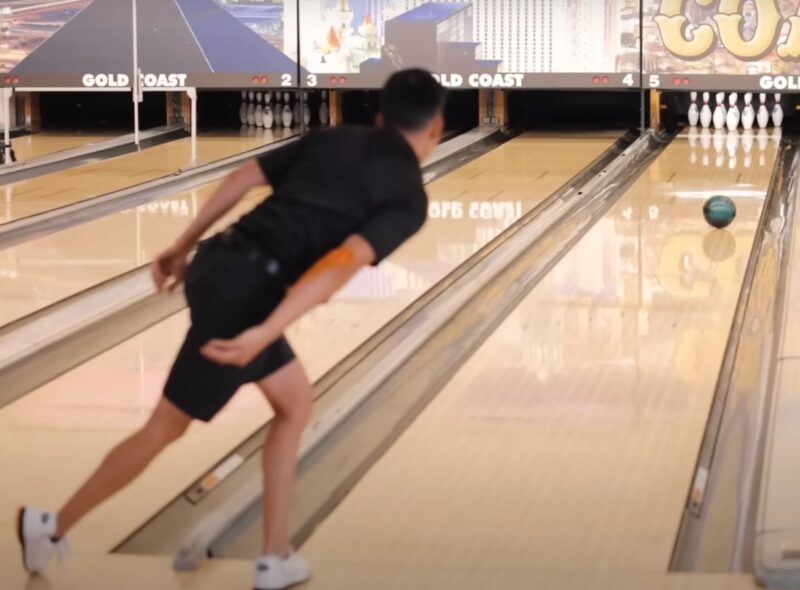
Timing and Technique of Release
Releasing the ball at the bottom of your swing is critical for a successful curve. As you reach the lowest point of your swing, relax your hand and let the ball roll off your fingers. This timing is crucial – too early or too late, and you’ll lose control over the trajectory.
Rotate Your Fingers
As you release, rotate your fingers, specifically your thumb, to direct the ball’s spin. This rotation is what causes it to curve. The degree of rotation determines the extent of the curve.
Start with a slight rotation and gradually increase it as you get more comfortable with the technique.
| Equipment Selection | Choose a ball that complements your body weight. Urethane or resin coated balls are preferred for curving. |
| Grip | Use a fingertip grip for better control and rotation. Consider custom drilling for a perfect fit. |
| Stance | Align your body with lane arrows, feet shoulder-width apart, weight balanced. Maintain a strong wrist position. |
| Approach | Start with a steady pace, increase speed towards the foul line. Keep movements fluid and focused on the target arrow. |
| Release | Release the ball at the bottom of your swing. Rotate fingers, especially the thumb, to control the ball’s spin. |
| Rotation Adjustment | Vary the rotation and speed for different curves. More rotation and speed for sharper curves, less for gradual ones. |
| Practice Drills | Start with a tennis ball or lighter bowling ball. Gradually move to heavier balls while focusing on wrist and finger movement. |
| Lane Adaptation | Adjust your technique based on lane conditions. More rotation for oily lanes, and a controlled release for drier lanes. |
Advanced Techniques
Adjusting the speed and rotation of your release is key to refining the curve of your bowling ball. A faster release combined with more finger rotation results in a sharper, more pronounced curve.
Conversely, a slower release with less rotation leads to a more gradual curve. It’s important to experiment with these adjustments to understand their effects on your bowling style and the trajectory.
Find Your Ideal Release Speed
Discovering the optimal release speed is a process of trial and error. Start by varying the speed of your approach and arm swing. Notice how changes in speed affect the curve. A faster arm swing generally results in a more aggressive curve, useful for knocking down pins positioned at acute angles.
Rotation Control
Controlling rotation involves precise finger and wrist movements at the point of release. Begin with a modest amount of rotation and gradually increase it. Pay attention to how the ball reacts on different parts of the lane. This practice helps in understanding the amount of rotation required for desired curve effects.
Finger Motion
To curve a bowling ball, the rotation of your fingers at the point of release is crucial. Imagine your fingers as the steering wheel of the curve. The thumb exits the first, followed by a rapid, upward motion of your fingers, particularly the middle and ring fingers.
This motion imparts the spin needed for the curve. It’s important to be smooth and consistent with this motion. Practicing finger rotation is essential. You can start off the lane, using a tennis ball or a lighter bowling one to get the feel.
Focus on the fluid motion of your fingers and thumb. A common mistake is to over-rotate, which can lead to inconsistency and loss of control. Aim for a balanced and controlled rotation.
Balance Power and Finesse
In bowling, power and finesse go hand in hand. While strength is important for momentum and pin action, too much force can lead to loss of control. The key is to find a balance. Your swing should be smooth and controlled, with power coming from your legs and torso, rather than just your arms.
Techniques for Power Control
To control your power, focus on your leg and torso movement. A slight bend in the knees during the approach can help you leverage strength from your lower body. Your torso’s rotation during the swing also contributes to controlled power. Remember, smooth and controlled movements lead to a more precise and effective curve.
Adjust to Lane Conditions
Every bowling lane is different, and lane conditions can significantly impact your curve. Oil patterns on the lane affect the ball’s trajectory. It’s important to observe how your ball reacts during the initial throws and adjust your technique accordingly.
For instance, a heavily oiled lane might require more rotation to achieve the same curve as on a drier lane. Once you’ve read the lane, adjust your release and rotation to match the conditions. On oily lanes, you might need to increase the rotation for a sharper curve.
On drier lanes, less rotation and a slower release might be more effective. Being adaptable is key in bowling, as lane conditions can change even during a game.
Common Mistakes and How to Avoid Them?
A common mistake in curving a bowling ball is overcompensation, either with too much power or excessive rotation. This often leads to inconsistency. Focus on controlled, consistent movements. Practice makes perfect, and over time, muscle memory will help in maintaining consistency.
Correct Your Stance and Swing
Another mistake is an incorrect stance or swing path. Ensure your stance aligns with the arrows, not the pins. Your swing path should be straight and aligned with your target. Any deviation can throw off your curve. Regularly check and correct your stance and swing path for better results.
FAQs
Is it OK to bowl straight?
Yes, it is OK to bowl straight, especially if you are a beginner or want to hit the remaining pins on the second throw. Before starting with practice, a beginner should also learn more about basic terms as well.
Why is it hard to hit a curve ball?
It is hard to hit a curve ball because it has a forward spin that makes it dive as it approaches the plate. This deceives the batter’s eyes and makes them misjudge the location and timing of the ball.
How do you throw a sinker?
To throw a sinker, you need to grip the ball along the two seams and apply pressure with your fingers on the inside edge of the ball. Then, you need to snap your wrist and arm downward as you release the ball, creating a forward spin that makes the ball sink and move horizontally.
How do you throw a riser?
To throw a riser, you need to grip the ball with your index and middle fingers on top of the ball and your thumb underneath. Then, you need to snap your wrist and arm upward as you release the ball, creating a backspin that makes the ball rise and curve.
Last Words
Curving a bowling ball is an art that combines technique, precision, and adaptability. By understanding and practicing the fundamentals of stance, grip, approach, release, and finger rotation, you’ll develop the skill to effectively curve the ball.
Adjusting to lane conditions and avoiding common mistakes further enhance your proficiency. Remember, the key to success in curving a bowling ball lies in practice, patience, and a continuous desire to improve.